
Python,兜兜转转,我又回来啦。
JS的事以后有机会再搞吧,近期由于学习的需要,于是重新搞起了python,简单地学习了一下Matplotlib库,还大概了解了一下爬虫和OpenCV库。先来简单聊聊Matplotlib库吧。
一、快速上手Matplotlib库
1 | # 导入包 |
基本的使用流程就是:引入包 —>创建一个画板—>使用对应绘图函数进行绘图—>展示图像
当然,里面还可以设置很多属性的,比如设置图像的标题、xy轴的注记,也有一些进阶的技巧,比如绘制多个子图等等。这个就需要后续继续探索了
另外matplotlib库经常会和numpy库一起使用,numpy 是一个运行速度非常快的数学库,主要用于数组计算,绘图过程中不可避免地要传入图像的各种坐标数据,这时候用numpy就非常方便了,具体提供了怎样的便利,使用过程中就可以渐渐体会到了。
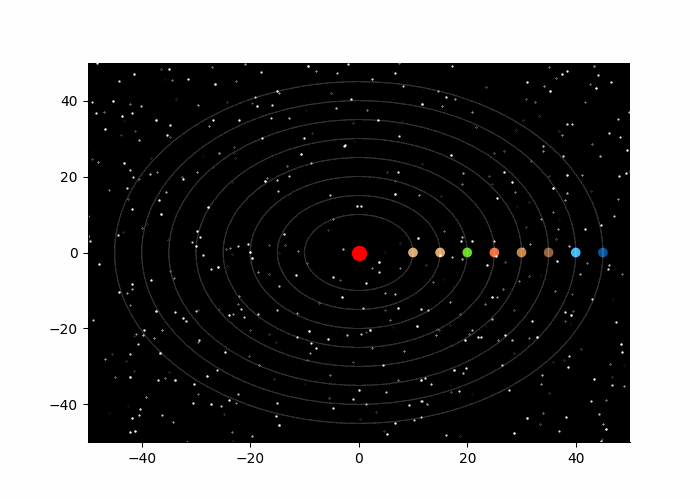
二、绘制太阳系行星的运转图
1、效果与源代码展示
1 | from matplotlib import pyplot as plt |
2、代码说明
第一部分,我们创建了一个类,可以用来实例化各个行星,也方便后续操作。
第二部分,我们就可以利用Matplotlib库进行绘图了。
这里稍稍说一下scatter函数吧
1 | # 省略引入库与创建画板 |
在向scatter函数里面传入坐标时,可以传入一个值,也可以传入一个列表,传入列表的话就代表的是绘制多个点了。
接着再来谈一谈FuncAnimation函数的几个参数
fig:画布对象,由创建画布时的返回得到,即
fig = plt.figure()frames:指定动图的帧数,但这个参数类型必须是可迭代的列表等,可自行设置。每次调用func函数对图像进行更新时,接口将自动向func函数提供此时的帧数frame,这使得更新数据十分方便
func:用于更新图片从而产生动态效果的调用函数,在编写时通常会用到set_data等类似的方法,其返回值是一个元素为被更新的图形对象的列表。同时,func可以接受帧数参数frame,用来更新每帧图像
简单地说就是可以给frames指定一个列表,动画函数会一直执行,次数与frames列表中元素个数相同,每次调用时,会将frames中的一个元素传递给func函数作为参数(第几次调用,就传递列表中第几个元素作为参数),然后利用这个参数就可以更新图像的点。
interval:更新频率,单位是毫秒
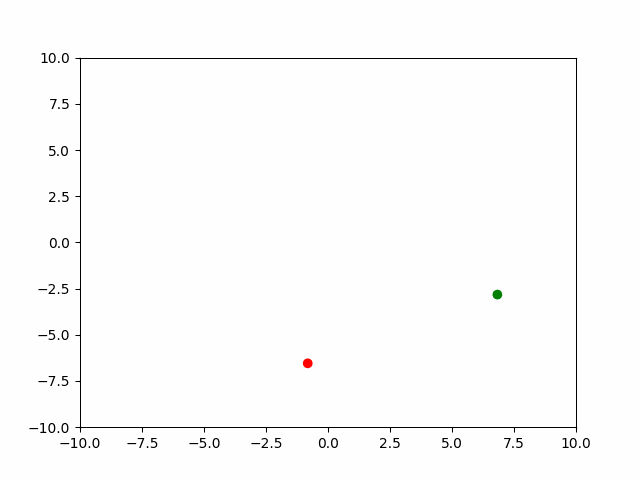
三、丧尸病毒传播
说明:编写一个函数,初始条件有若干丧尸与健康人,丧尸会追逐最近的人,追上则感染对方。人会检测与之最近的丧尸,朝其反方向奔跑。且丧尸速度大于人的速度
1、效果与源代码展示
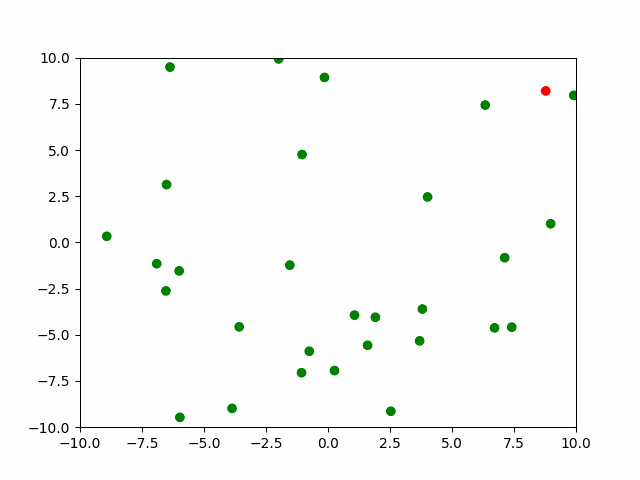
1 | import numpy as np |
2、代码思路
在有了matplotlib库的一些基础后,这个题目的难点基本就剩两个了,一、如何获取最近距离的点,二、如何实现追逐与逃跑的函数。
对于第一个问题,我们可以引入sklearn.neighbors,里面有方法可以帮助我们解决。
对于第二个问题,这里提供一个思路:追逐函数可以这样定义:
1 | # 以猎人为视角的追逐算法,传入最近的对象,然后追逐。锁定两个目标 |
既然是追逐,那肯定就要让两个点越来越近,以丧尸与人横坐标为例,二者之差大于零,说明丧尸偏右,那就让丧尸向左移,其他的就与之类似。实际上,逃跑函数和追逐函数也差不多。
3、总结与改进
代码运行中,其实还有有一些问题的。比如,最后有可能会出现丧尸追不上人的情况,也挺鬼畜的,挺好玩的,哈哈。这是人合理利用了机制嘛,这是特性,绝对不是bug,当然也可以对追逐函数再进行补充,使其能够 ”跨边界追踪”。
另一个就是,有时候,某个人会突然不动,杵在原地,这个暂时还没有解决,期待大佬的解答。也欢迎大家提出其他优化建议啊。
四、心得与总结
刚开始接触新东西,确实挺懵的,但凡是都要循序渐进嘛,而且精通一门技术是很难,但入门其实还是挺容易的。主要还是从题目出发,需要什么就去学习什么,初期也可以参考别人的代码,起初可能看不明白每一行的含义,但最后一定是要弄懂的,在这个过程中,可以在别人代码上进行增删修改,或者去看某个函数伙方法的具体含义、运转机制。在多次尝试以后,一定可以掌握入门技巧的。
以上就是最近学习成果中的一部分了,其实还简单地了解了一下爬虫和OpenCV部分,感觉还挺有意思的,不过目前刚刚算是入门中的入门,在这这里就不丢人了。主要还是任务驱动嘛,学习以及做项目的需要,所以最近学习的确实挺杂的。另外也确实有点迷茫,不知道该往哪个方向去钻研。走一步看一步吧,暂时缺失还没有想好。